Module · Finance
Management of bank journals
Management of bank journals
The interface ofBanking Journalis an intuitive and powerful tool designed for managing and monitoring financial transactions linked to one or more bank accounts. It provides a clear overview of transactions carried out, allowing users to view, record and analyze financial movements in an organized manner. This interface is mainly aimed at financial managers, accountants or users wishing to ensure precise monitoring of their banking flows.
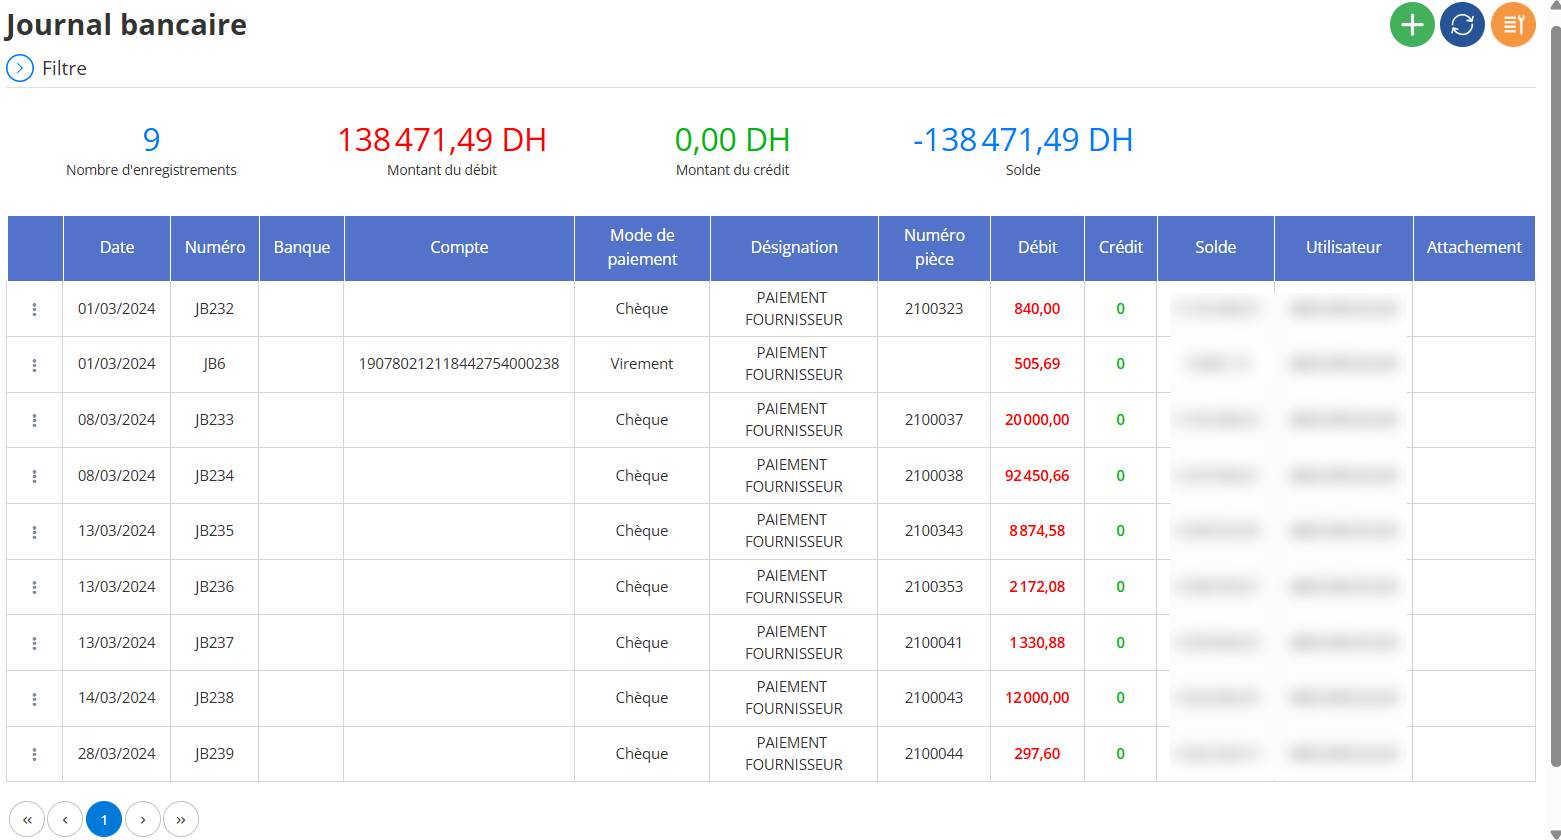
Adding a Bank Transaction to the Bank Journal
Step 1: Access the Add Form
Open the Banking Journal:The user must first go to the main interface of the “Banking Journal”.
Click on the “+” Button:At the top right of the interface, there is a green button with a "+" icon. This button allows you to add a new banking transaction.
- Action :Click this “+” button.

- Result:This opens the form titled“Banking transactions”.
Step 2: Complete the “Banking Transaction” Form
Once the form is opened, the user must fill in the necessary fields to register a new banking transaction. Here is a detailed description of the sections and fields to complete:
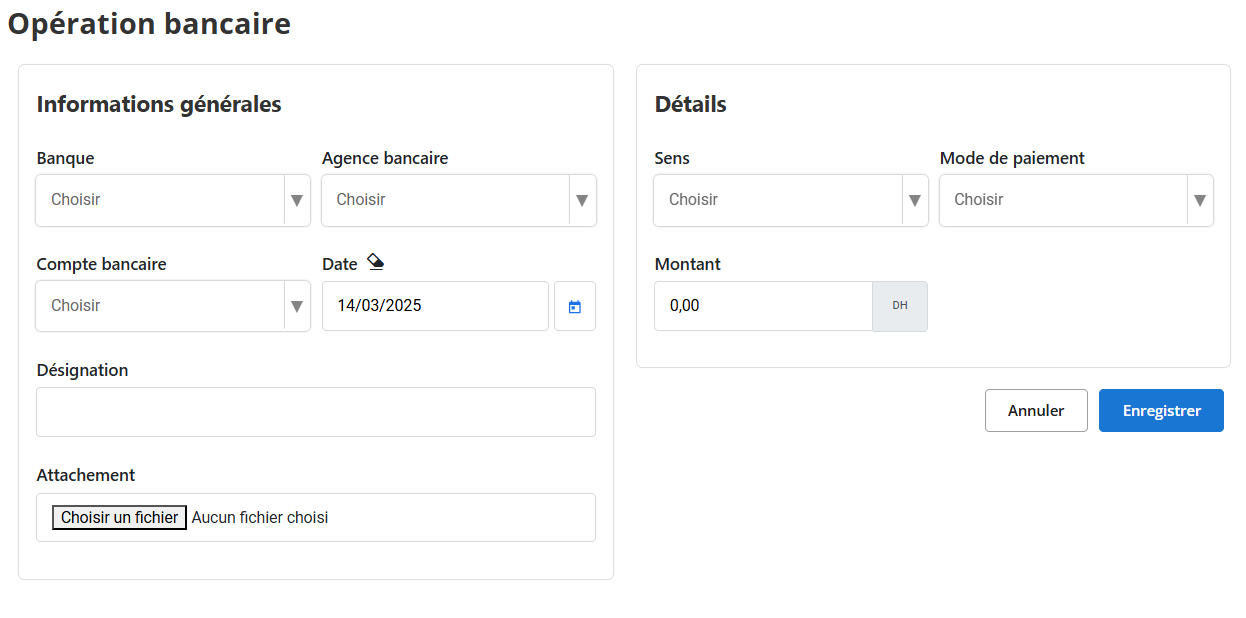
General Information (Left Side)
Bank:
- A drop-down menu displays “Choose”. Click on it to select the bank concerned by the operation (for example, a specific bank like the one associated with the codes "JB22", "JB6", etc.
Bank branch:
- Another drop-down menu with "Choose". Select the bank branch corresponding to the chosen bank.
Bank account:
- Drop-down menu with "Choose". Select the bank account from or to which the transaction will be carried out.
Date :
- This field displays a default date (for example, "03/14/2025", as in the image). Click the calendar icon on the right to choose a different date if necessary.
Designation :
- A free text field to enter a description of the operation. For example, in the previous banking journal, all transactions were designated as "VENDOR PAYMENT". You can write a similar or different description, such as "INVOICE PAYMENT" or "CUSTOMER DEPOSIT".
Section 2: Details (Right Side)
Meaning:
Drop-down menu with "Choose". Select the transaction type:
- Speed:If money is withdrawn from the account (for example, a payment).
- Credit :If money is added to the account (for example, a deposit).
- In the bank journal example, all transactions were debits (no credits). Here you can choose according to the type of operation.
Payment method:
Drop-down menu with "Choose". Select the payment method, such as:
- Check(as seen in the log, e.g. for operations JB22, JB23, etc.).
- Payment.
- Or other options available (cash, card, etc.).
Amount:
- Field to enter the amount of the operation in dirhams (DH). By default, it is “0.00 DH”. Enter the exact amount, for example "12,000.00".
Section 3: Attachment (Bottom)
Choose a file:
- This field allows you to attach a file (for example, a receipt, invoice or proof). Click "Choose File" to select a document from your computer.
- By default it shows "No files chosen". Once the file is selected, its name will appear here.
Step 3: Save or Cancel the Operation
“Cancel” button:

- Located on the right at the bottom, this button allows you to cancel the addition of the operation and close the form without saving the changes.
“Save” button:
- Located on the right at the bottom, this blue button allows you to save the banking transaction.
- Action :Once all fields are completed correctly, click "Save".

Result:
- The transaction is added to the bank journal.
- It will appear in the main table with the details entered (date, bank number, payment method, amount, etc.).
- The balance will be automatically updated in the “Balance” column of the table.