Module · Fleet
Importation Horaires
Importation Horaires
La fonctionnalité d'Importation des Index Horaires permet d’ajouter plusieurs enregistrements d’index horaire à votre base de données en une seule fois en téléchargeant un fichier pré-formaté, généralement au format Excel. Cette option est particulièrement utile pour :
- L'ajout initial d'un grand nombre d'index horaires pour différents véhicules.
- La mise à jour massive des informations sur les heures d'utilisation des véhicules.
Étape 1 : Télécharger et préparer le canevas
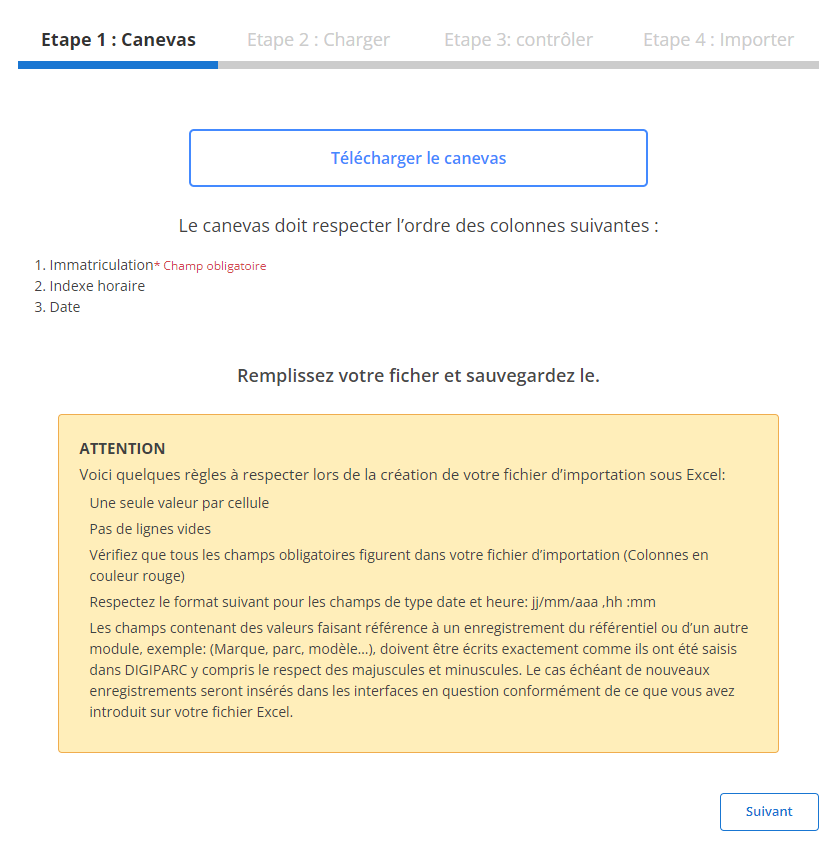
Télécharger le canevas: Un fichier modèle est disponible en téléchargement et doit être utilisé pour préparer les données. Ce fichier respecte un format précis avec des colonnes prédéfinies.
Respecter l'ordre des colonnes:
- Les champs obligatoires, comme le véhicule, la date, le compteur horaire, et l’utilisateur, sont marqués en rouge.
- Il est essentiel de maintenir l'ordre des colonnes spécifié pour assurer une importation réussie.
Conseils pour la préparation du fichier:
- Une seule valeur par cellule.
- Aucune ligne vide.
- Respect des formats de date et d'heure (jj/mm/aaaa hh).
Prérequis: Le fichier doit être structuré selon les spécifications du système, avec les informations obligatoires (Véhicule, Date, Compteur horaire, et Utilisateur).
Étape 2 : Charger le fichier
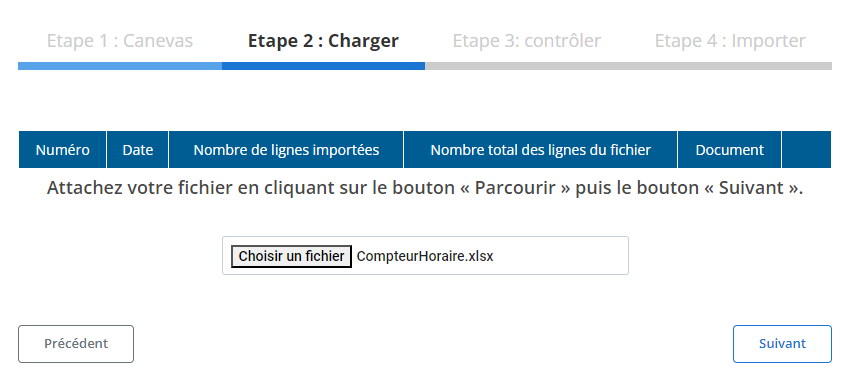
Une fois le fichier rempli, procédez ainsi :
- Cliquez sur "Parcourir" pour sélectionner votre fichier.
- Appuyez sur "Suivant" pour lancer le chargement.
- Un récapitulatif apparaîtra, indiquant le nombre de lignes importées ainsi que le total de lignes dans le fichier.
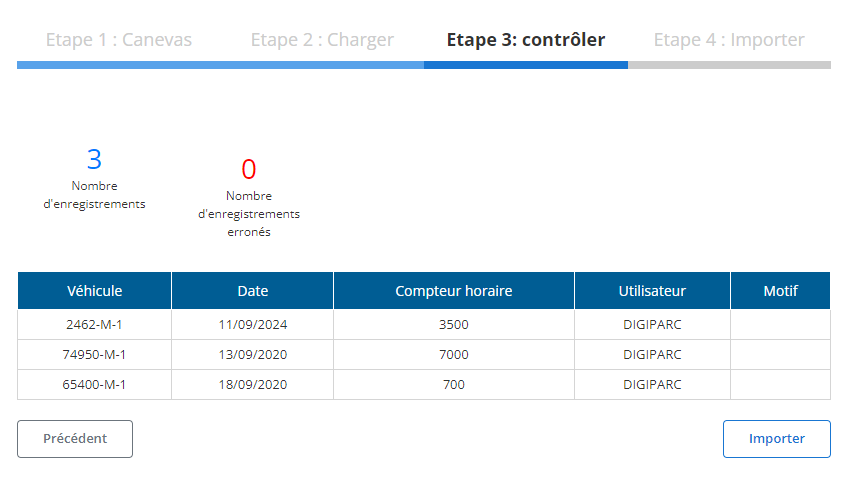
Étape 3 : Contrôler les données importées
Après le chargement du fichier :
- Un tableau récapitulatif des enregistrements importés s'affiche.
- Le système signale également le nombre d'erreurs éventuelles et le nombre d'enregistrements valides.
- Les détails pour chaque enregistrement (Véhicule, Date, Compteur horaire, Utilisateur) sont visibles pour une vérification finale avant l'importation.
Étape 4 : Importer les index horaires
Après avoir contrôlé les données :
- Cliquez sur "Importer" pour valider et ajouter les index horaires dans la base de données.
- Un message de confirmation vous informera de la réussite de l’importation.