
Module · HR
Importation Congés
Importation Congés
Permet l’ajout rapide de plusieurs demandes de congé en une seule opération via un fichier prédéfini.
Les gestionnaires peuvent importer de grandes quantités de congés d’un seul coup, sans avoir à entrer chaque demande individuellement. Ce processus accélère considérablement la gestion des absences, réduisant ainsi les risques d'erreurs liées à la saisie manuelle. Grâce à cette méthode d’importation, les congés sont intégrés de manière fluide dans le système, garantissant une mise à jour rapide des informations sans perturber le flux de travail quotidien.
Étape 1 : Télécharger et préparer le fichier modèle
Avant de commencer l'importation des données de congés, vous devez d'abord télécharger un fichier modèle conçu spécifiquement pour cette tâche. Ce fichier contient des colonnes prédéfinies qui doivent être respectées pour garantir une importation fluide et sans erreur. Voici comment préparer ce fichier :
-
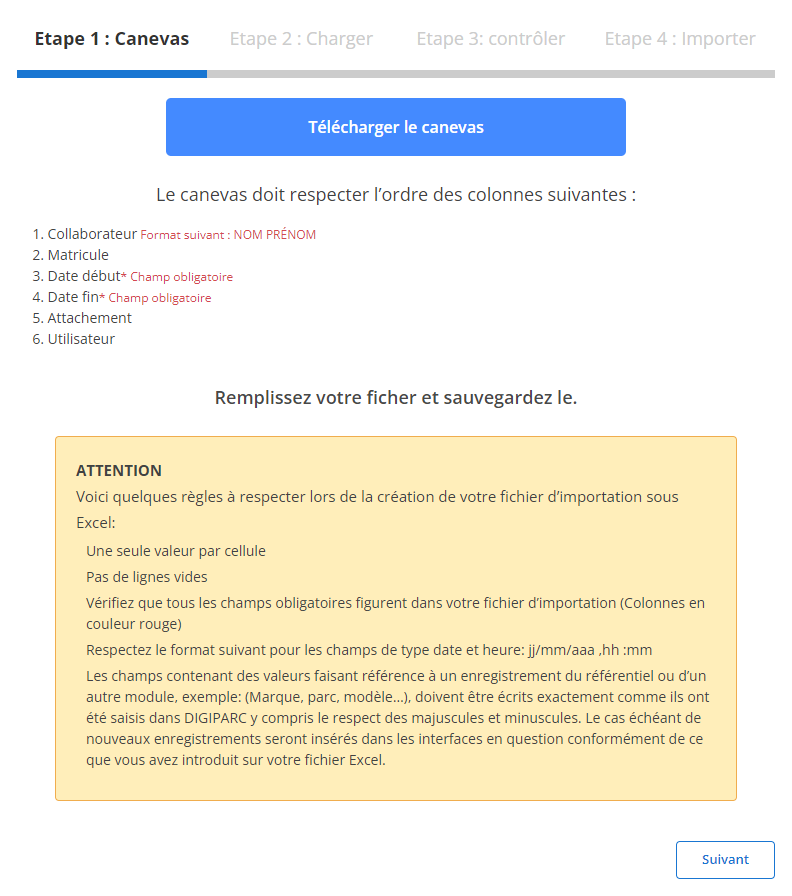
Téléchargez le modèle: Le fichier modèle est facilement accessible via l'interface. Il comprend des colonnes indispensables à l'importation, et chaque colonne doit être remplie dans un ordre précis.
-
Respectez l'ordre des colonnes: Chaque colonne du fichier correspond à une donnée spécifique et certains champs sont obligatoires. Par exemple :
- Collaborateur(obligatoire)
- Date début(obligatoire)
- Date fin(obligatoire)
Il est essentiel de remplir ces champs pour chaque ligne, car un champ manquant ou mal renseigné pourrait entraîner une erreur dans l'importation.
Préparez votre fichier:
- Veillez à ce qu'il n'y ait qu’une seule valeur par cellule.
- Évitez les lignes vides au milieu du fichier.
- Assurez-vous que les dates (par exemple, date de début et de fin) respectent le format attendu (jj/mm/aaaa).
Étape 2 : Charger le fichier de congés
Une fois que votre fichier est correctement préparé, vous pouvez passer à l'étape suivante : le chargement du fichier dans le système.
-
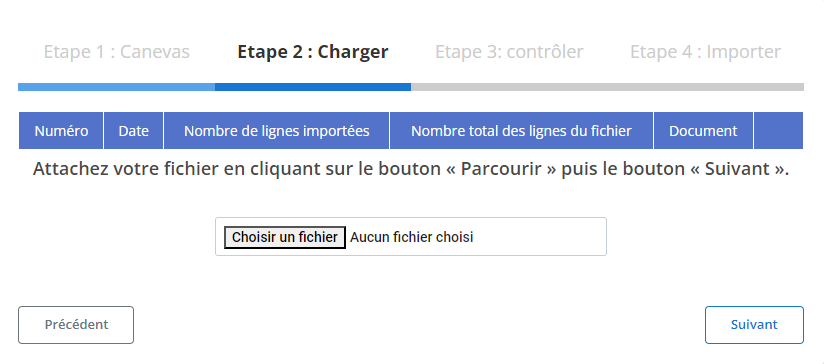
Sélectionnez le fichier: Cliquez sur le bouton "Parcourir" pour localiser le fichier modèle sur votre ordinateur, puis sélectionnez-le.
-
Lancez le chargement: Une fois le fichier sélectionné, cliquez sur le bouton "Suivant" pour démarrer le processus de chargement des données. Le système analysera le fichier et préparera les informations pour une vérification finale.
-
Récapitulatif des données: Un récapitulatif s'affiche à l'écran, vous montrant le nombre total de lignes du fichier ainsi que le nombre de lignes prêtes pour l'importation. Ce récapitulatif vous permet de faire une première vérification du contenu avant de procéder à l'étape suivante.
Étape 3 : Vérification des données importées
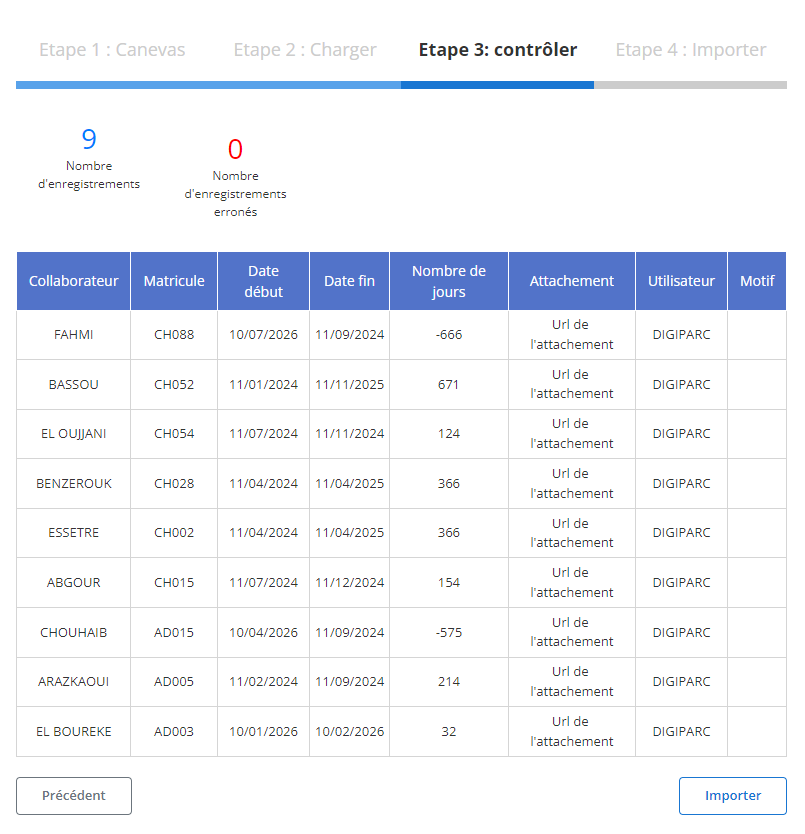
Après le chargement du fichier, un tableau récapitulatif s'affiche avec tous les enregistrements issus du fichier. À cette étape, il est crucial de vérifier que toutes les données sont conformes :
-
Contrôle des erreurs: Le système met en évidence toute erreur potentielle, comme des valeurs manquantes dans les champs obligatoires ou des formats incorrects. Par exemple, si un collaborateur ou une date est manquant(e), cela sera signalé.
-
Vérification des enregistrements corrects: Les lignes sans erreurs seront mises en évidence comme étant prêtes pour l'importation finale. Vous pouvez examiner chaque ligne pour vous assurer de la conformité des informations, telles que :
- Collaborateur (Format : NOM PRÉNOM)
- Matricule
- Date de début
- Date de fin
- Nombre de jours
- Attachement (s’il y en a un)
- Utilisateur
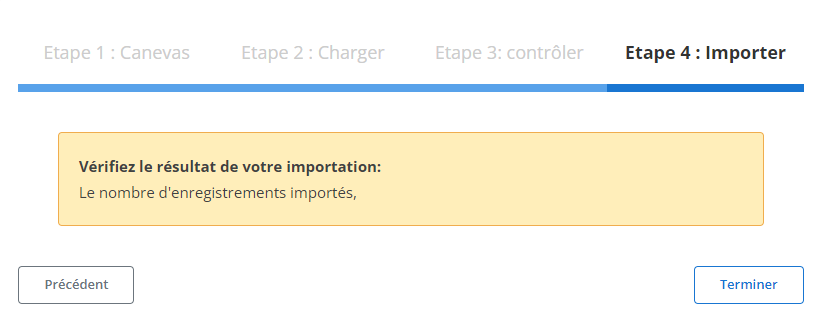
Étape 4 : Finaliser l'importation des congés
Une fois que les données ont été vérifiées et corrigées, vous pouvez procéder à l'importation définitive des congés dans le système.
-
Finalisez l'importation: Cliquez sur le bouton "Importer" pour valider l'importation et ajouter les congés dans la base de données.
-
Confirmation d'importation: Un message de confirmation apparaîtra pour indiquer que l'importation a été réalisée avec succès et que tous les congés ont été ajoutés correctement.
Ce processus structuré d'importation des congés permet aux responsables des ressources humaines ou des gestionnaires de congés de gagner du temps et de réduire les risques d'erreurs lors de l'ajout en masse des congés. Grâce à cette méthode, les informations sont intégrées de manière précise et cohérente, garantissant ainsi un suivi efficace et une gestion fluide des absences au sein de l'entreprise.